1. Insert the gearbox into crossmember, being careful not to damage gearbox boot.
2. Install the gearbox and stiffener. Temporarily tighten the bolts.
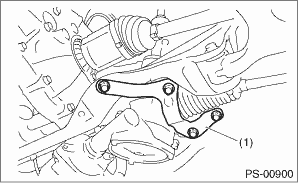
|
(1) |
Stiffener |
3. Insert bolts through the stiffener to temporarily tighten the gearbox to the crossmember.
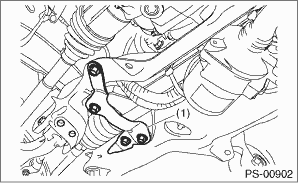
|
(1) |
Stiffener |
4. Tighten the bolts temporarily holding the gearbox clamp and bracket together to the specified torque.
Tightening torque:
60 N·m (6.1 kgf-m, 44.3 ft-lb)
5. Install the universal joint. 
6. Connect the tie-rod end and knuckle arm, and tighten with castle nut.
Castle nut tightening torque:
27 N·m (2.8 kgf-m, 19.9 ft-lb)
CAUTION:
When connecting, do not hit the cap at the bottom of tie-rod end with hammer.
7. After tightening the castle nut to the specified tightening torque, tighten it further within 60° until the cotter pin hole is aligned with slot in the nut. Fit the cotter pin into the nut, and then bend the pin to lock.
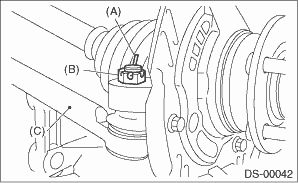
|
(A) |
Cotter pin |
|
(B) |
Castle nut |
|
(C) |
Tie-rod end |
8. Install the front stabilizer.
9. Install the front crossmember support plate and jack-up plate.
10. Install the front exhaust pipe.
11. Install the under cover.
12. Install the front wheels.
13. Tighten the wheel nuts to the specified torque.
Tightening torque:
100 N·m (10.2 kgf-m, 73.8 ft-lb)
14. Lower the vehicle.
15. Remove the steering wheel.
16. Align the center position of the roll connector.
17. Install the steering wheel.
18. Connect the power steering control module harness connector.
19. Connect the ground cable to battery.
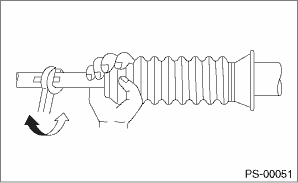
20. After adjusting toe-in and steering angle, tighten the lock nut on tie-rod end.
Tightening torque:
85 N·m (8.7 kgf-m, 62.7 ft-lb)
NOTE:
When adjusting toe-in, hold the boot as shown to prevent it from being rotated or twisted. If it becomes twisted, straighten it.