1. Insert the ball joint into housing.
Tightening torque (Bolt):
50 N·m (5.1 kgf-m, 36.9 ft-lb)
CAUTION:
Do not apply grease to the tapered portion of ball stud.
2. Install the ball joint into front arm.
Tightening torque (Castle nut):
39 N·m (4.0 kgf-m, 28.8 ft-lb)
3. Retighten the castle nut further up to 60° until the hole in the ball stud is aligned with a slot in castle nut. Then, insert a new cotter pin and bend it around the castle nut.
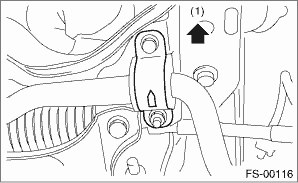
4. Install the stabilizer bracket.
NOTE:
The stabilizer bracket has a set orientation. Install it with the arrow mark facing the upper side of the vehicle.
|
(1) |
Front side |
Tightening torque:
25 N·m (2.5 kgf-m, 18.4 ft-lb)
5. Install the front vehicle height sensor. (model with auto headlight beam leveler, left side only)
Tightening torque:
7.5 N·m (0.76 kgf-m, 5.5 ft-lb)
6. Install the front vehicle height sensor connector. (model with auto headlight beam leveler, left side only)
7. Install the front wheels.
8. Connect the ground cable to the battery.
9. Re-initialize the auto headlight beam leveler system. (model with auto headlight beam leveler) 