NOTE:
• If only a single part is replaced, perform the work with the engine mounted on the vehicle.
• To avoid mixing the timing chain assembly component parts, separate each part after their removal.
1. Disconnect the ground cable from battery.
2. Lift up the vehicle.
3. Remove the under cover.
4. Drain the engine coolant. 
5. Drain the engine oil.
6. Remove the air intake boot.
7. Remove the air intake duct and hose.
8. Remove the radiator sub fan motor assembly.
9. Remove the radiator main fan motor assembly.
10. Remove the radiator.
11. Remove the catalytic converter and DPF.
12. Remove the V-belts.
13. Remove the V-belt tensioner.
14. Remove the crank pulley.
15. Remove the scavenger pump.
16. Remove the vacuum pump.
17. Remove the camshaft position sensor.
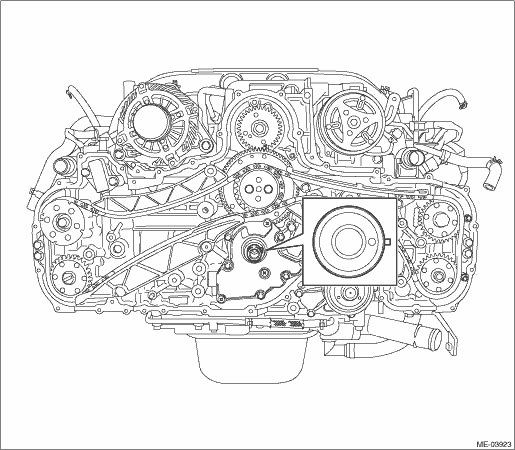
18. Remove the oil level gauge and oil level gauge guide from the chain cover.
19. Remove the chain cover.
20. Using ST, align the position of the crank gear key at the 3 o’clock position as shown in the figure.
| ST 18252AA000 | CRANKSHAFT SOCKET |
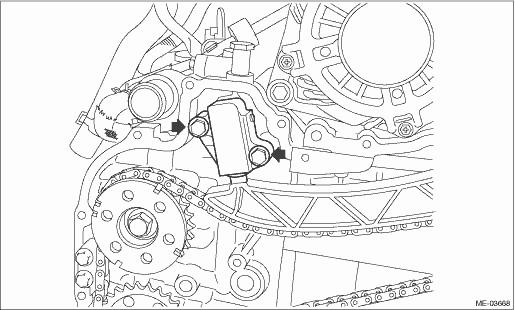
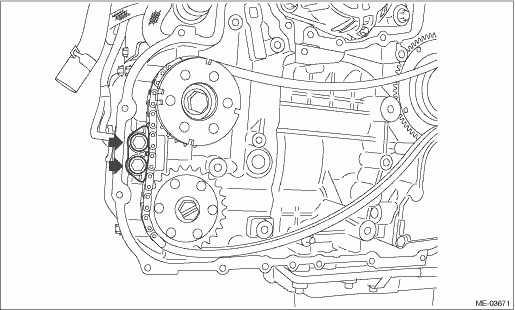
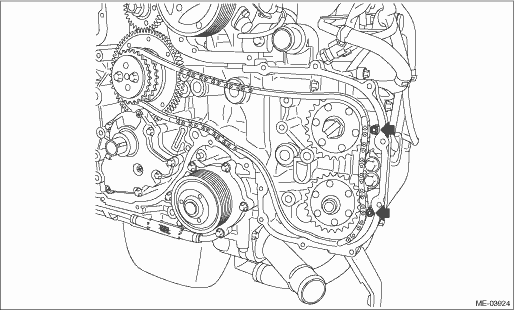
21. Remove the chain tensioner (RH).
NOTE:
When removing chain tensioner (RH), hold the plunger by hand so that it does not come flying out.
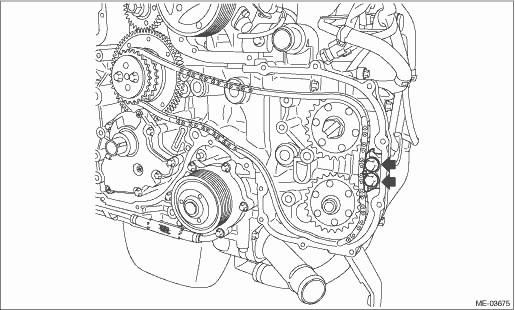
22. Remove the chain tensioner lever (RH).
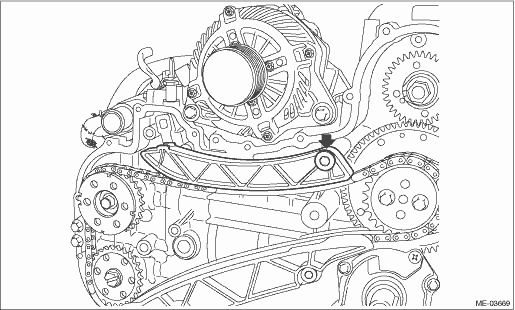
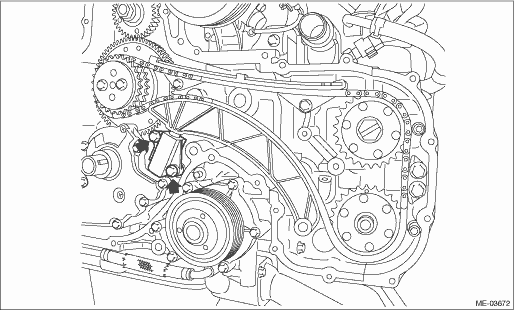
23. Remove the chain guide (RH).
24. Remove the chain guide (RH: between cams).
25. Remove the timing chain (RH).
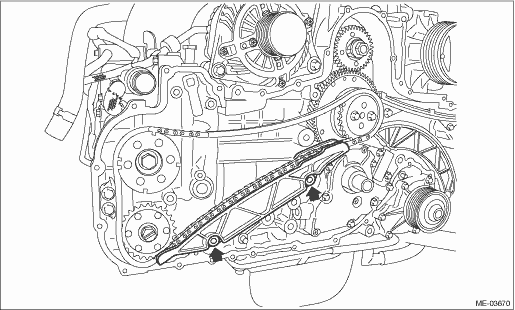
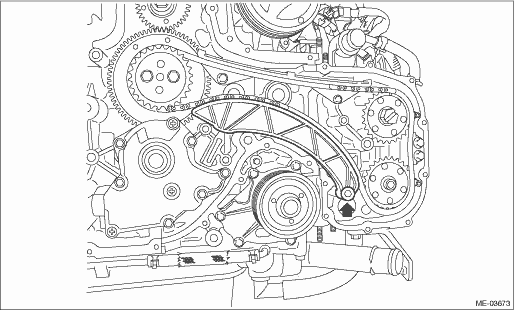
26. Remove the chain tensioner (LH).
NOTE:
When removing chain tensioner (LH), hold the plunger by hand so that it does not come flying out.
27. Remove the chain tensioner lever (LH).
28. Remove the chain guide (LH).
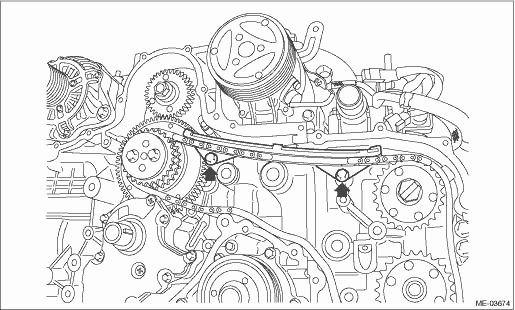
29. Remove the chain guide (sprocket).
30. Remove the chain guide (LH: between cams).
31. Remove the timing chain (LH).