WARNING:
Place “NO OPEN FLAMES” signs near the working area.
CAUTION:
• Be careful not to spill fuel.
• When the fuel meter indication is higher than two third of the total, perform the work after draining the fuel not to spill the fuel.
• Be careful not to drop or apply any impact to the fuel pump during work. This may deteriorate its performance.
NOTE:
The fuel filter is built in fuel pump assembly.
1. Remove the fuel pump assembly. 
2. Remove the fuel level sensor.
3. Disconnect the pump assembly connector from the sub tank bracket assembly.
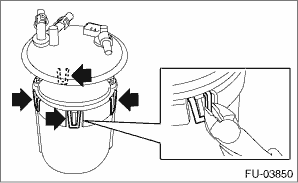
4. Cut off the tab holders connecting the sub tank bracket assembly and the sub tank in four locations, and separate the two.
CAUTION:
Be careful not to damage the sub tank.
NOTE:
If the O-ring is remaining on the sub tank, remove.
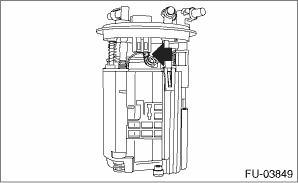
5. Disconnect the fuel piping connector from the fuel filter assembly in two locations.
6. Push to compress the fuel filter assembly in the direction of the arrow, remove clip (A), and separate the sub tank bracket assembly and the fuel filter assembly.
CAUTION:
When separating the sub tank bracket assembly and the fuel filter assembly, be careful not to damage the ground wire.

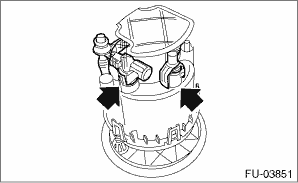
7. Disconnect the connector from the pump assembly.
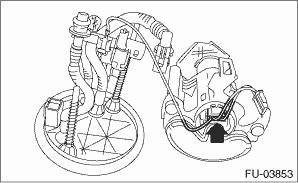
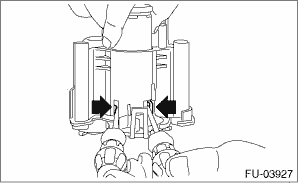
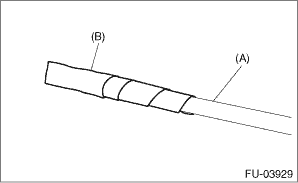
8. Lift the two tab holders connecting the pump assembly to the fuel filter using a flat tip screwdriver (with a shaft diameter of approx. 3 mm), etc., and separate the fuel filter and pump assembly.
CAUTION:
• To prevent damaging the tabs of the pump assembly, wrap the tip of the flat tip screwdriver (A), etc. with tape (B).
• Be careful not to drop or apply any impact to the pump assembly.
NOTE:
If the spacer and O-ring is remaining on the pump assembly, remove these.