1. Disconnect the ground cable from the battery.
2. Remove the instrument panel lower cover from instrument panel.
3. Remove the clevis pins which secure the brake pedal to the brake booster operating rod. Also disconnect the stop light switch connector.
4. Remove the two bolts and four nuts which secure brake pedal to pedal.
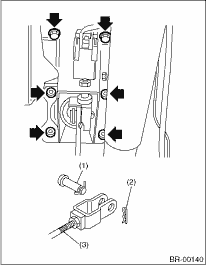
|
(1) |
Clevis pin |
|
(2) |
Snap pin |
|
(3) |
Operating rod |
1. Remove the steering bolt.
2. Raise the vehicle on a lift and remove the two bolts which secure the steering unit to the underside of the body.
3. Lower the vehicle.
4. Remove the instrument panel lower cover from instrument panel.
5. Disconnect the following parts from pedal bracket.
• Operating rod of brake booster
• Connector (stop light switch, etc.)
6. Remove the clevis pin which secures the lever and push rod.
7. Remove the nut which secures the clutch master cylinder.
8. Remove the steering assembly.
9. Remove the accelerator pedal.
10. Remove the bolts and nuts which secure the pedal bracket.
NOTE:
The brake pedal bracket is a non-disassembly part, but removal during replacement is performed as follows:
1. Disconnect the ground cable from the battery.
2. Remove the instrument panel lower cover from the instrument panel.
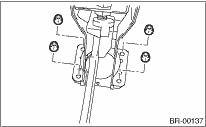
3. Fix the brake pedal bracket in place with a piece of wire, etc.
NOTE:
• To prevent the bracket from opening and the center of the brake pedal from slipping out of place, affix it with a piece of wire.
• Be careful not to overtighten the wire.
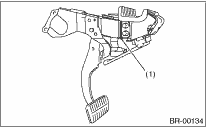
|
(1) |
Wire |
4. Remove the bolts holding the left and right brake pedal brackets (Front side).
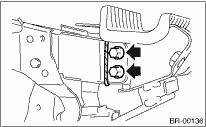
5. Remove the 4 bolts that hold the brake pedal bracket (Rear side).
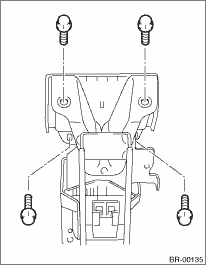
6. Remove the nuts holding the brake pedal bracket (front side).
7. Remove the brake pedal.
NOTE:
When removing the pedal, do not twist the bracket.