1. Loosen the nuts fastening the switch assembly terminal M, then disconnect the connector.
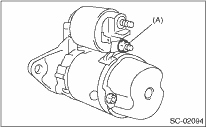
|
(A) |
Terminal M |
2. Remove the bolts fastening the switch assembly, then remove the switch assembly, plunger and plunger spring as a unit from the starter.
NOTE:
Be careful because the pinion gap adjustment washer may sometimes be used on the mounting surface of the switch assembly.
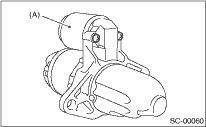
|
(A) |
Switch ASSY |
3. Remove the bolts on both sides, then remove rear cover set.
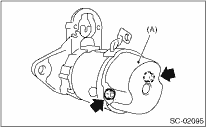
|
(A) |
Rear cover set |
4. Remove the bolts passing through both sides, and the brush holder screws, then remove rear cover and brush holder assembly.
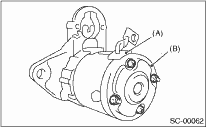
|
(A) |
Brush holder ASSY |
|
(B) |
Rear cover |
5. Remove the armature and yoke assembly from the front bracket.
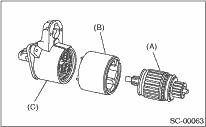
|
(A) |
Armature |
|
(B) |
Yoke ASSY |
|
(C) |
Front bracket |
6. Remove the packing A, planetary gears and packing B.
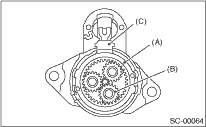
|
(A) |
Packing A |
|
(B) |
Planetary gear |
|
(C) |
Packing B |
7. Remove the plate.
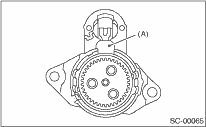
|
(A) |
PLATE |
8. Remove the shaft assembly and overrunning clutch from the front bracket.
NOTE:
Check the following points before removal.
• Lever direction
• Internal gear assembly position
|
(A) |
Lever |
|
(B) |
Shaft ASSY |
|
(C) |
Overrunning clutch |
|
(D) |
Internal gear ASSY |
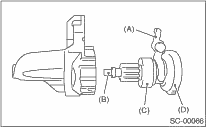
9. Use the following procedures to remove the overrunning clutch from the shaft assembly.
(1) Use the appropriate tool (such as the right size of socket wrench) to lightly tap on the stopper to remove it from the ring.
(2) Remove the ring, spacer, and clutch from the shaft.
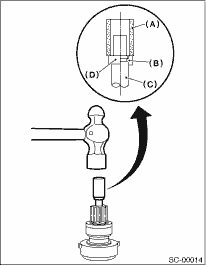
|
(A) |
Socket wrench |
|
(B) |
Ring |
|
(C) |
Shaft |
|
(D) |
Stopper |